
How to Fix a Rip in Your Sofa Like a Pro
That moment when you spot a rip in your favorite leather sofa can be heartbreaking. Whether it's a small tear from a mischievous pet, a split along a seam, or a larger gash from moving furniture, the damage can feel permanent. You immediately start thinking about expensive reupholstering or, worse, replacing the entire piece.
Stop right there!
The good news is that most common rips and tears in leather furniture are completely repairable right in your own home. You don't need expensive professional tools or previous upholstery experience. With the right technique, a little patience, and a dedicated DIY leather repair kit, you can seamlessly mend that rip, restore the color, and prevent further damage, saving yourself significant time and money.
Ready to restore your leather couch to its former glory? Let's dive into the step-by-step guide for fixing that rip and making it virtually invisible.
How to Repair a Rip in Your Leather Sofa: Step-by-Step Guide
Successfully repairing a rip or tear in your leather sofa requires a methodical approach, especially if you want the fix to be strong and invisible. This process is focused on using a standard DIY leather repair kit, which typically includes a backing cloth, adhesive/filler, and color dye/compound.
HOW TO CLEAN LEATHER COUCH. Get the expert guide to deep cleaning, conditioning, and 100% odor removal. Your sofa deserves it!
Phase 1: Preparation and Stabilization
The goal of this phase is to stop the rip from getting larger and create a stable foundation for the repair compound.
Step 1: Clean the Area
Before applying any product, the area must be spotless.
-
Wipe: Use a cloth dampened with rubbing alcohol (isopropyl alcohol) to clean around the rip. This removes body oils, dirt, and any residual leather conditioners that could prevent the adhesive from bonding.
-
Dry: Allow the area to dry completely.
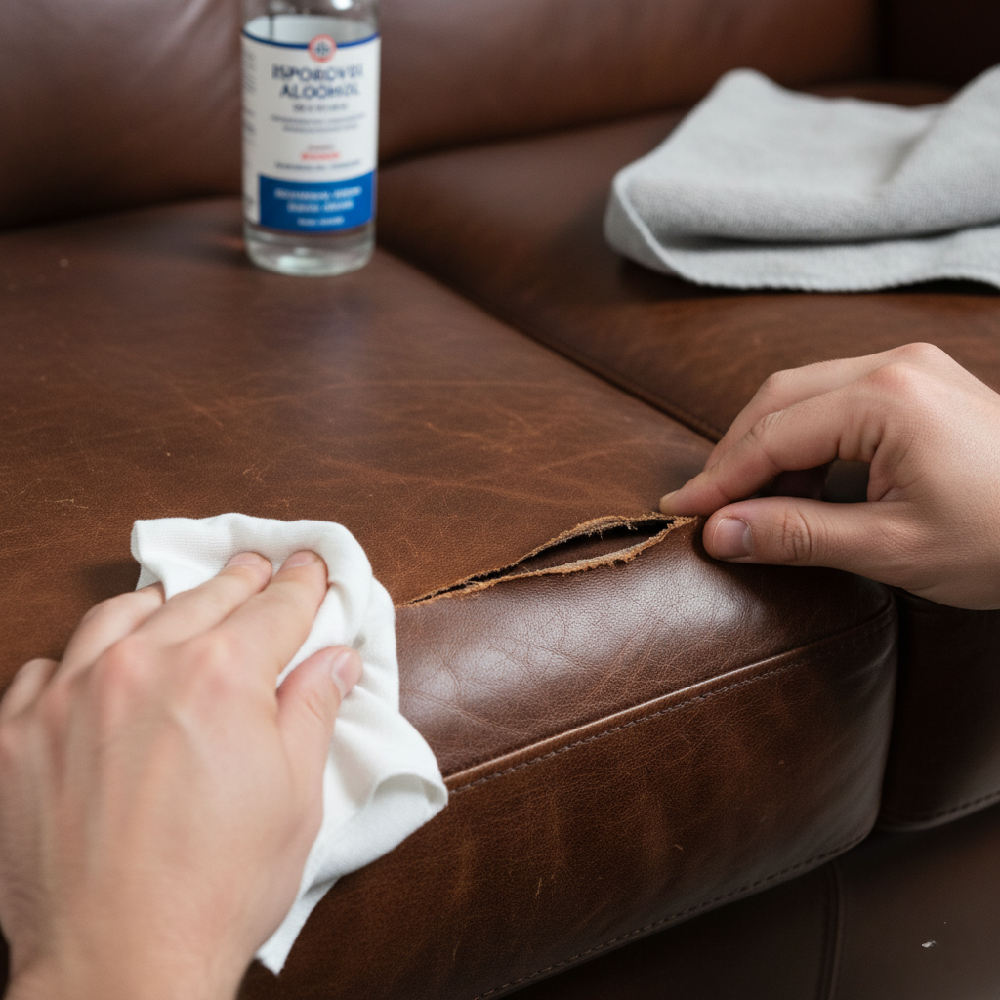
Step 2: Trim the Rip
If the tear has any frayed, loose, or wispy threads of leather, carefully trim them away with small, sharp scissors. The edges of the rip should be as flat and clean as possible so they don't protrude under the patch.
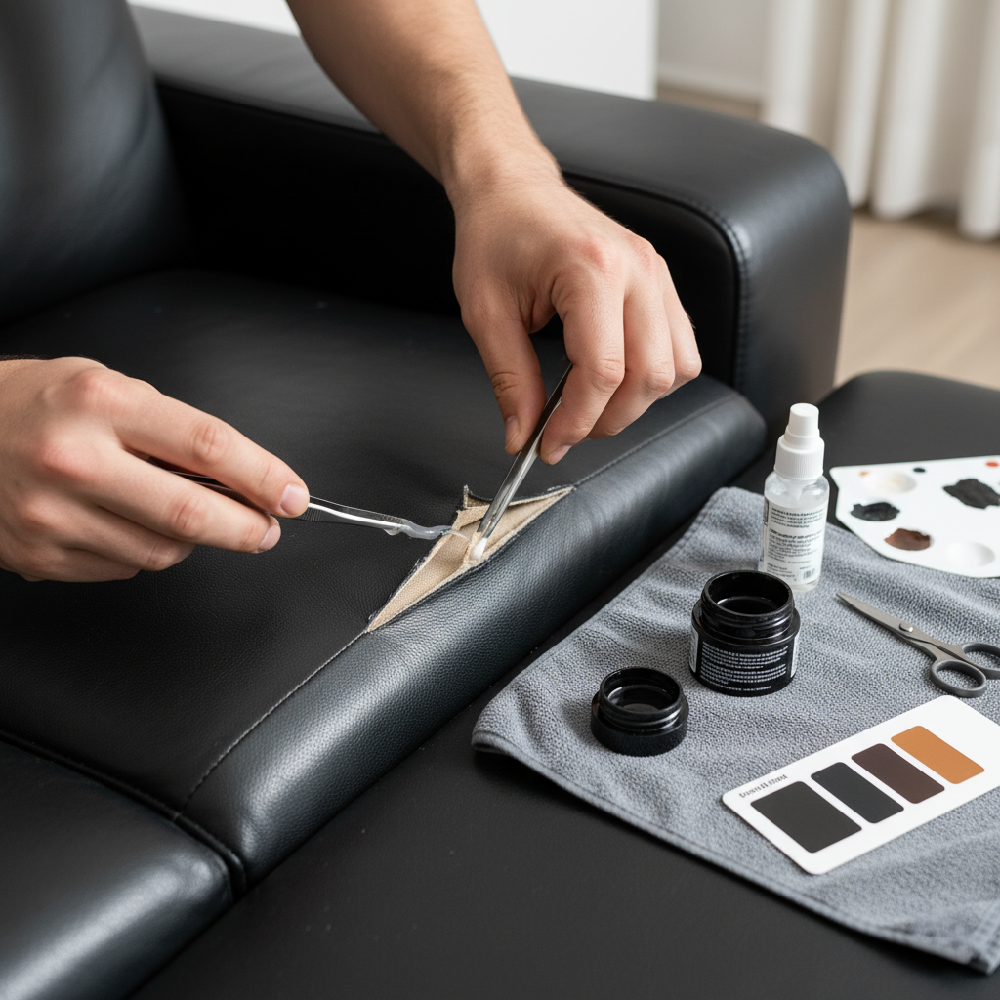
Step 3: Insert the Subpatch (The Foundation)
This is the most critical step for strength. The subpatch (or backing cloth) provides the structure for the repair.
-
Cut: Cut the included subpatch material so it's about half an inch larger than the rip on all sides. The goal is for the patch to lay completely flat under the damaged area.
-
Insertion: Use tweezers to slide the patch material underneath the rip. Center it so the entire tear is sitting over the fabric.
-
Secure: Apply a small amount of strong leather adhesive (often found in the kit) or super glue to the edges of the subpatch, securing it to the underside of the original leather around the perimeter of the rip. Do not glue the rip itself yet. Let the adhesive cure according to the kit's instructions.
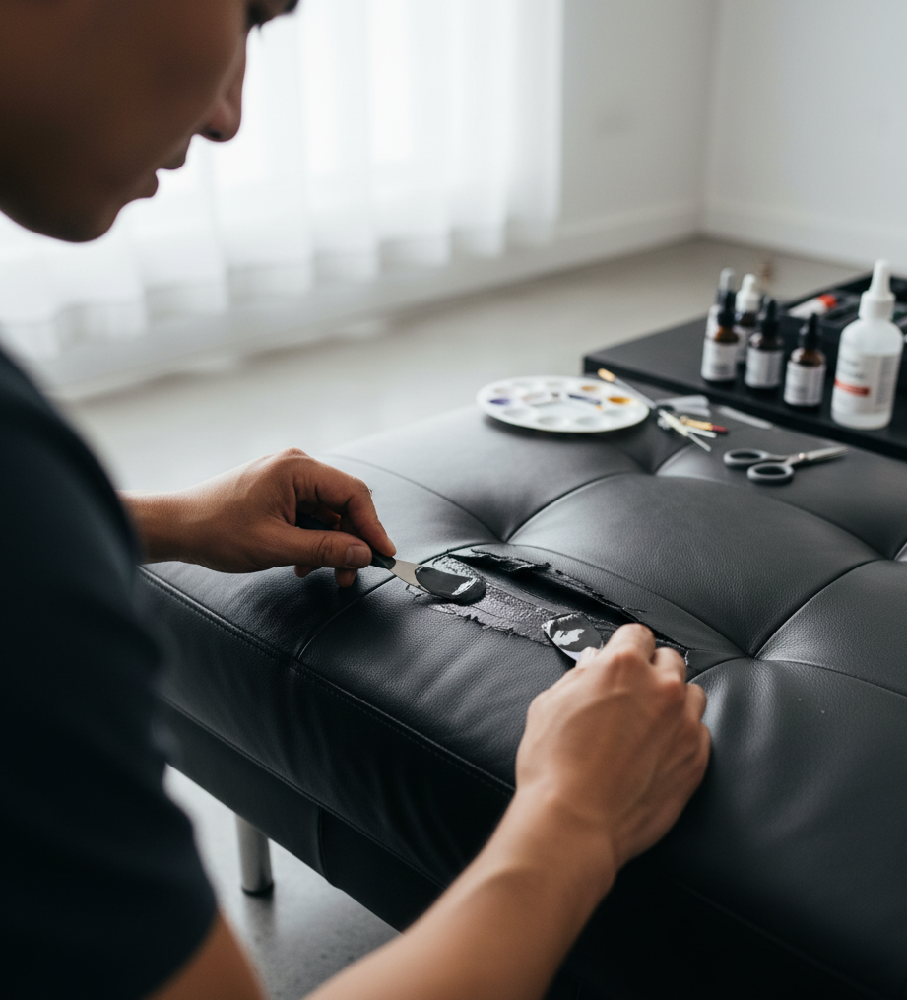
Phase 2: Filling and Texturizing
Now that the rip is stable, you will fill the gap and prepare the surface for coloring.
Our new guide reveals 3 easy methods to make any couch taller, even those without legs! Say goodbye to low-rider seating.
Step 4: Apply the Repair Compound/Filler
The repair compound is a thick, flexible paste designed to fill the void.
-
Application: Using the included applicator or a small spatula, apply a thin layer of the compound directly into the rip. Work it into the gap, smoothing it out so the surface is flush with the surrounding leather.
-
Build Layers: For deep rips, it's essential to apply multiple thin layers rather than one thick one. Allow each layer to dry (usually 30 minutes to an hour) before applying the next. This prevents shrinkage
Step 5: Add Texture (If Necessary)
If your leather has a noticeable grain (texture), you'll need to mimic it for an invisible repair.
-
Option A (Kit Method): Many kits include a small piece of textured paper or vinyl. Press this paper onto the final, still-wet layer of filler before it dries. When you peel it away, it transfers the grain pattern.
-
Option B (Slight Grain): Gently dab the wet filler with a sponge or a piece of plastic wrap to create a slightly irregular, non-smooth texture.
Revamp your living room! Discover the perfect carpet colors to pair with your brown leather sofa in our new styling guide.
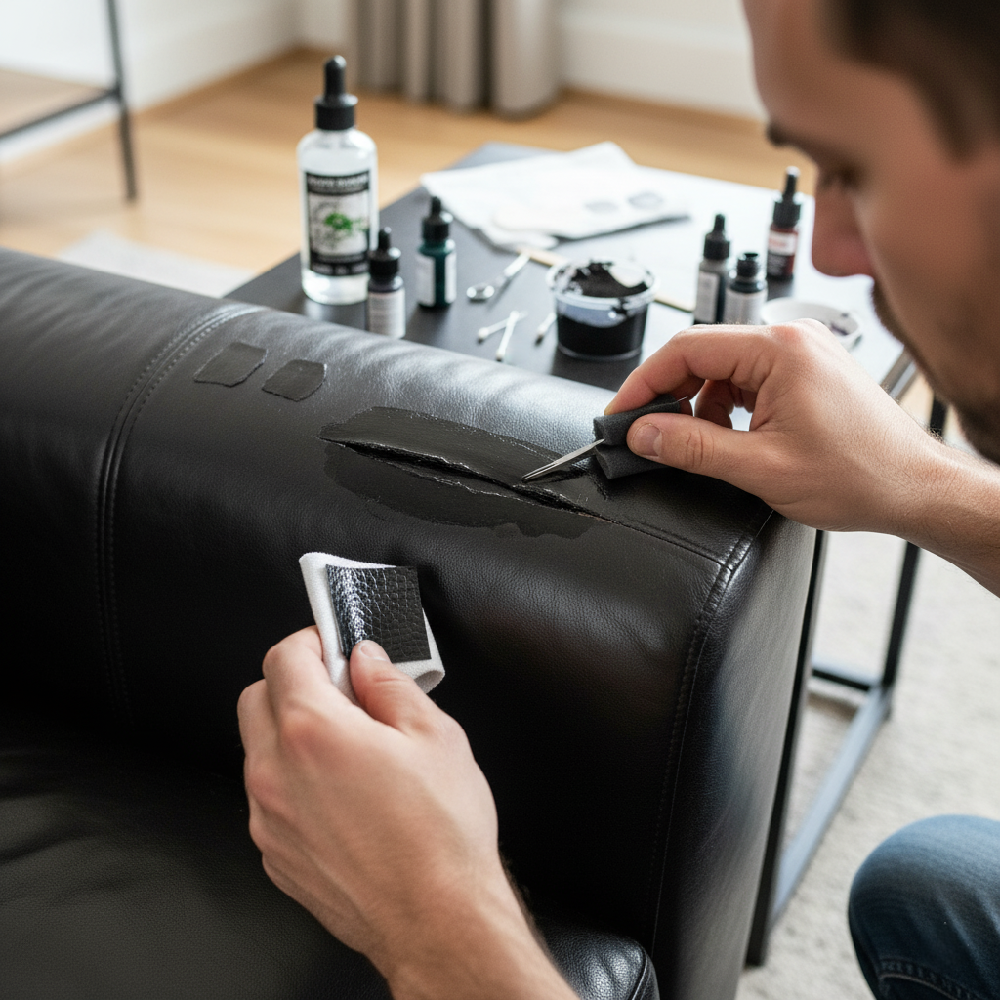
Phase 3: Coloring and Finishing
The final phase uses color matching to blend the repair perfectly into the sofa.
Step 6: Color Match and Prep
Leather repair kits often include several color dyes (tints) and a mixing container.
-
Mix: Start with the base color provided and add small drops of the darker or lighter tints until the color matches the undamaged leather on your sofa. Always mix more color than you think you need!
-
Test: Crucially, test the mixed color on a hidden spot of the sofa (like the rear skirt) and let it dry. Leather color often darkens as it dries. Adjust until the dry test patch matches.
Step 7: Apply the Color Compound
-
Layer Thinly: Using a small sponge, brush, or cotton swab, apply the matched color compound thinly over the repaired patch. Extend the color slightly beyond the patch onto the original leather to blend the edges seamlessly.
-
Feather the Edges: Use a light, dabbing motion around the outside edge of the repair to "feather" the color into the surrounding leather.
Step 8: Final Cure and Conditioning
-
Final Dry: Allow the repair to dry completely, typically 24 to 48 hours, depending on the number of filler and color layers applied. Avoid sitting on the area during this time.
-
Seal (Optional): Some advanced kits include a final clear sealant or topcoat to protect the repair.
-
Condition: Once cured, treat the entire area with a quality leather conditioner. This reintroduces oils lost during cleaning and helps the repaired area blend naturally with the rest of your sofa.
Pro Tip: For rips larger than 3 inches, consider seeking a professional, as the stability required for a long-lasting fix becomes much more challenging for a DIY repair.
From thrones of power to your cozy living room: Dive into the fascinating evolution of the sofa! 🛋️Discover the hidden history of your favorite couch in our latest blog post!